


I know I said I would be moving to a password protected blog, which is what I hope to work on during movie time today (both kiddos are sick and as such we are staying home from church). For those of you who do read this regularily, you should be getting an e-mail from me, inviting you to the "new and improved" Nepper's Landing. AKA, hacker free. I think I will still keep another blog (to be revealed) to share some of my DIY projects. If I have a private blog, I can't partake in all of the fabulous blogger parties, and that just won't do! So I'll have TWO BLOGS! Bwah, ha, ha, ha...
Take that random man in India!
On to my tea dye project. Remember my most fabulous farmhouse window? Well, I just couldn't leave it as is. I have been meaning to tea dye the fabric, and then use a staple gun to attach the fabric to the window frame. Well, I finally found the time and I am quite pleased with the results.
So tea dyeing. Hmm. What I could find online was fairly informative, although there are a lot of different methods and opinions. So what I show here, its just what I did, and well, it worked for me. Some people said the tannic acid in tea will break down fabrics eventually, but in this case, I really don't plan on using this same fabric for the next 50 years. People said don't use herbal teas as it doesn't dye properly. Some said try a small piece first. Some said to only dye natural fabrics (cotton, silk, etc). You know the drill.
As for me, I just like to do bit of research and then jump right in, and in this scenario, I think its pretty foolproof.
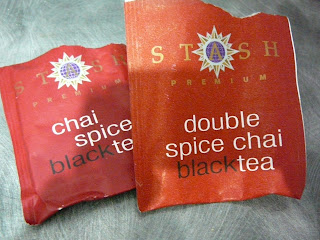
First, I got whatever black tea I had on hand. In my case it turned out to be two different types of chai tea (I only realized they were different when I took the picture!). Mmm, few things compare to the smell of Chai Tea!
Then I steeped them in a juice jug for about 5 minutes.

In the meantime I boiled off a kettle, and put it into my largest pot. Then added a bit of my tea until I got the color I wanted. Then I started adding the fabric piece by piece. I left the fabric in the pot to "steep" for about 5 minutes per piece.

I think this would be easier if you were using just one piece of fabric, but in my case, I had to re-do a few pieces because one piece ended up darker than the others. I didn't want to throw them all in the pot at the same time just because I didn't want any uneven dyeing to go on. Another key is to make sure the fabric isn't folded anywhere. I used tongs to "stir the pot" and get the fabric evenly covered (if you've ever dyed clothing, its a very similar process).
Once I got the color I wanted, I put them in a bowl and ran cold water over them to set the color. Once the water ran clear, I rung them out and hung them to dry over my sink.

Once they were dry, I ironed the pieces, and got out the Hubby's handy dandy staple gun and attached them to the window frame...
This is the pre-tea dyeing...

Post tea dyeing.

I like the new "worn, weathered, and loved" look.

Rob used the term "dirty" to describe it which is slightly shocking. Trust a man. I prefer a word like "aged." Its always like a woman to sugarcoat things!
Anyway, I hope you enjoyed my tea dyeing tutorial, if you can even call it that. Basically its as simple as making a cup of tea, and if you can't do that...well, um...yeah, I'm sorry for your luck!

No comments:
Post a Comment
We'd love to hear from you...