

Showing posts with label Recipes. Show all posts

Tuesday, February 5, 2013

Favorite Thing #34: My Juicer

So did you know that I juice vegetables and fruits almost daily? I've been at it for over a year now. Yup, I'm just full of surprises aren't I? Below is my beloved Braun juicer. A whopping $11 at the Nanaimo Sally Ann Thrift Shop. One of my best thrift shop purchases, ever.
 What got me onto juicing you ask? Well, it was this documentary, Fat, Sick and Nearly Dead. 
 I've mentioned this film before on my blog. It really was a great documentary. Whether or not you are actually looking into juicing, its an eye opening look at what has happened to the health of America. Joe Cross found the solution to his own health problems and obesity through a medically supervised 60-day juice fast. The results are stunning.

And this is a total aside, but as I was looking for the documentary image on my computer I stumbled upon this one. Seriously, Damn You Autocorrect really does give me a good case of the giggles...
ANYWAY...ahem, as I was saying. I love my juicer. Oh right, next question, why do I juice? Well, I'm no doctor, but I figure getting in all that veggie goodness, in liquid form, has to be a good thing. And yes, I realize I am not getting the pulp/fiber the same way I would be if I actually ate all the vegetables I juice, but seriously...have you eaten this today?
This is actually a pretty basic juice as I have to head to the veggie store in the next few days, but these are the key ingredients of every juice I drink. Its A LOT of veggies, so no, I don't usually eat that much in a day. And here's another random secret about me, I don't like citrus fruits, at all. Like to sit down an eat an orange...yeah, not gonna happen. Blech. So through juicing I get all that vitamin C goodness that I am missing out on and I will add in the occasional grapefruit slice. Sometimes I will mix it up and include some of the following ingredients:
A handful of Spinach
1 Stalk of Kale
Beets
1 Stalk of Celery
Pineapple

Plus, have you ever eaten that much ginger (bottom right) like raw? ever? Yeah, me neither. So I figure there has to be something to getting that much gingery goodness. I had to start small at first, because it really packs a punch, but now I'm up to about a 1.5" chunk without really noticing. And speaking of ginger, here's a word to the wise. If you by-chance happen to be sent to the store to pick up a 1" chunk of ginger for your wife, please don't come home with this...
Apparently in all of my husband's 37 years, he was not aware that you could actually break chunks off the ginger root. No, no, instead you are required to buy entire BRANCHES of the stuff. Oy.

At the end of it all, this is what my juice ended up looking like today. Very orange, but I also don't have spinach and kale, which usually adds a lot of green. Yum.
What's the taste like you ask? Well, honestly, today's was like a zesty orange juice. We once made a green drink and Rob agreed with Dr. Oz (or was it Oprah...) who said it tastes like a cup of fresh. It literally does! Usually I find including apples and carrots adds enough sweetness to make just about anything tolerable. That said, I only do it because I enjoy it. If I despised the taste it and had to gag it down, it wouldn't be worth it to me.

The prepping of the veggies and the cleaning of the machine is a bit of a hassle, but I figure the rewards are worth it. Usually the entire process takes me 10 minutes start to finish (prepping, juicing, cleaning), so really not a huge chunk out of my day. Its usually my later morning drink as I need my coffee first thing. 

I do it because I feel better when I do. I can't really explain it beyond it makes me feel less bleh. I can physically feel when I haven't been juicing, I just feel weighed down. Plus, I think because I juice, I end up eating less throughout the day. It is by no means a meal replacement, but it certainly fills me up for a good hour or so. 

What is the cost? Well, I've never sat down and figured it all out per glass, but it certainly adds up depending on where you buy your veggies. You have to think I am using an entire apple, an entire orange, 1/3 of a head of romaine, etc, etc. Thanks to the great prices at H+W Produce here in Edmonton, I can keep up with my daily juicing as well as buy our regular fruits/veggies for around $30 every 10-14 days. Below is my receipt from last week. Like honestly, the prices and the quality are phenomenal!
 There you have it folks. A little known fact for your day...
I ❤ juicing.

If you are interested in learning a bit more about juicing, here is a great article/podcast I found on Dr. Joseph Mercola's website (although I have zero idea what he is talking about when he says Carb type or Protein type).


PS. And if you hadn't noticed, I added an update to my Soft Shell jacket post. Turns out, a few days later, I ended up finding the same jacket for $17.62 cheaper than the uber crazy sale price I had paid. Um...ahmazing!

Wednesday, October 17, 2012

Favorite Thing #86: All Things Pumpkin.

I am always amazed at how the change of seasons inspires things that I barely have to think about. They just seem to come naturally. As if they were innate. 

I begin to look for cozy sweaters.
I notice that my kettle is boiling more throughout the day (I usually have a cup of tea in the afternoon and one in the evening. Peppermint is my current fave). 
My scarf collection is unearthed from its bin.  As are my toques. And mittens.
I notice I bake more with my kids. Something about Fall makes me want to bake. 
I make soups and stews, A LOT. 
And all of a sudden, I find I am again drawn to one of my favorite things. Pumpkins!

This of course starts with Starbucks releasing their Pumpkin Spice Latte. For Starbucks lovers this is an important day of the year. Probably up there with Victoria Day or President's Day in the US. Apparently there is a shortage of the pumpkin spice syrup this year in Canada. I have personally not experienced this, but it seems every year, more and more people get on the PSL train. My new PSL revelation? Ask for it stirred. The syrup is so thick, the typical espresso shot swirl isn't enough to fully mix the syrup in. So ask for it stirred. Seriously. 

 This little cartoon was all over facebook this year. I'm glad to know I'm not the only one who uses Starbucks drinks to determine the time of year.

So if you'll remember, last year I roasted up Archie (almost to the day actually!) and froze a bunch of pumpkin puree. I still have about 3 ziplocs left. Which I'd say is just about perfect considering the price of pumpkins is plummeting. Soon enough I will purchase Archie 2 and have enough pumpkiny goodness to last me another year. 

One of my first pumpkin recipes of the Fall was a roaring success. This recipe is definitely a keeper. I got it over at My Blessed Life. Beyond delicious.

Before you start, make sure to brew yourself a piping hot cup of coffee! Yum. 
 
 You may also want to consider recruiting a cute overall-clad helper. This boy loves to bake with his Mama! (Preferably recruit your own child. Picking up a random child off the road may ruin the experience, you know, jail time and all). 

Pumpkin Chocolate Chip Cookies
Makes: 3 dozen cookies.
Prep Time: 15 minutes.
Oven: 350°

Ingredients:
2 C. Flour
1 Tsp. Salt
1 Tsp. Baking Soda
1 Tsp. Cinnamon
3/4 C. Sugar
3/4 C. Brown Sugar
1/2 C. Butter, softened
1 Egg, beaten
1 Tsp. Vanilla
1/2 C. Canned Pumpkin
1/2 C. Mini Chocolate Chips

Instructions:
1. In a medium bowl, combine first four ingredients. Set aside.
2. In a large bowl, cream sugars and butter. Add egg, vanilla, and pumpkin; beat well.
 3. Gradually mix in flour mixture on low speed. Stir in chocolate chips.
 4. Drop by tablespoons onto ungreased cookie sheets.
5. Bake at 350° for 10-12 minutes or until edges are golden brown. Cool on wire racks and stire in an airtight container.
 *Hollys Tips. Yes, there are always some...

I am trying to be more conscious about my sugar intake. Some woudl argue chocolate chip cookies is not the place to do this. I disagree. No way does anyone need 1.5 cups of sugar. So I used half of that. Tasted perfectly fine to me (and my kdis, and my husband, and my neighbors).

I now only use unsalted butter. I'm also trying to reduce salt intake.

Instead of canned pumpkin, you guessed it, I used my own pumpkin puree. Probably not as rich of a taste or color as canned, but still just enough to add a hint of pumpkin (plus it cost considerably less than canned pumpkin). 

 Next time, I would consider making up my own pumpkin spice to add to this recipe.

I made my cookies a bit smaller than the recommended tablespoons so that they would strech further.   

Once they are baked, find a quiet corner, or a noisy one, depending on your preference, and enjoy these cookies with your piping hot cup of coffee. Fall afternoon bliss.

Wednesday, June 13, 2012

Favorite Thing #22: Nutty Quinoa Salad

This Spring Gabe joined his first ever soccer team. The Pirates. Argh! If you haven't watched 3 year old soccer, you are missing out. It is one of the most amusing sights. Ever. Well, other than watching Abbi do Zumba. Equally adorable and soul lifting stuff. 

Our little soccer star. 
I should clarify, Gabe is not really at all interested in soccer. This may change, but at this point he is far more concerned with sticking out his arms and flying around the field like an airplane. But he's happy to run along (behind) the pack. And he certainly doesn't kick and scream when we tell him we have a game or a practice. So I figure it's worth every penny, because some days its near impossible to keep up with this little boy. 

Getting two kids fed, dressed, out the door, on my own, by 5:45pm is challenging, which is why I have declared Wednesday night sandwich nights. I whip together some pb+j for the kids and something a little fancier for Rob and I. And last week, I put our favorite salad on the side, Nutty Quinoa Salad. Seriously, this stuff is like candy. We have to double the recipe now because otherwise it doesn't leave any leftovers. 

Seriously. That's my kind of meal. Sooo good.
My Mom gave me a Company's Company cookbook a few years ago, called "Healthy in a Hurry." Honestly, there isn't much else in there that appeals to me, but this recipe is a gem.

Nutty Quinoa Salad

Salad Ingredients
1.5 C. Water
3/4 C. Quinoa
1/2 C. Red (or Green) Pepper, chopped
 1/2 C. Celery, chopped
1/2 C. Cucumber, chopped
1/2 C. Green Onion, chopped
2 Tbsp. Cilantro, chopped
1/3 C. Unsalted Peanuts, chopped

Nutty Lime Dressing
3 Tbsp. Peanut Butter
2 Tbsp. Lime Juice
1 Tbsp. Rice Vinegar
2 Tsp. Soy Sauce (or Braggs)
1 Garlic Clove, minced
2 Tsp. Ginger Root, grated

1. Rinse and soak quinoa for a few minutes. Then combine with water in a medium saucepan. Bring to a boil. Reduce heat to medium. Simmer, covered, for about 15 minutes until the water is absorbed. Rinse with cold water. 

*Or put it in your rice cooker. Same ratio, 1 C. Quinoa to 2 C. Water. This is what I do.

2. Meanwhile, combine the next 5 ingredients in a medium bowl.

3. For the nutty lime dressing, combine 6 ingredients into a small bowl and whisk until combined. Makes about 1/2 C. dressing. Drizzle over salad. Mix in quinoa. Top with chopped peanuts.

I found the following nutrition info on MyFitnessPal. Sadly, good ol' Jean doesn't include this information in her cookbook.  

Serving Size: 1 Cup
Calories: 273
Total Fat: 14g (Sat. Fat: 2g, Poly. Fat: 4g, Mono. Fat: 6g)
Cholesterol: 0mg
Sodium: 256mg
Potassium: 0mg
Carbs: 31g
Fiber: 5g
Protein: 10g


Saturday, June 2, 2012

Favorite Thing #23: Granola

I don't have much time to post today. This weekend is incredibly busy. Like a bit mind bloggingly busy. Lets see, today goes something like this...

9am. Gabe's soccer game.
11am. Husband at dentist. 
11am-1pm. Holly attempts to finish paper due at midnight.
2pm. Gabe's soccer game.
3pm-5pm. Holly does finishing touches on paper due at midnight.
6pm. Girl's night out, including a movie and dinner.

I just wanted to take a few moments to share my latest accomplishment! I mastered my granola recipe! Yippee! I've been wanting to make my own granola for awhile now, and found a fantastic recipe thanks to Clean Eating. But it took me 3 tries to get it just right (I had to lower the recommended oven temp and stir it mroe often during cooking. The changed oven temp is noted below). I have all of the indredients on hand, most of the time. I'm a big fan of the bulk section these days, so my Mason jars are chock full of granoly goodness. 
INGREDIENTS
3/4 cup sunflower seeds
1 1/2 cups oatmeal
1/4 cup ground flaxseed
1/2 cup dried cranberries
1/2 cup slivered almonds
1/2 cup shredded coconut, unsweetened 
3 tbsp natural peanut butter
1/2 tsp fine sea salt
1/3 cup raw honey
1/2 tsp vanilla

INSTRUCTIONS:
Preheat oven to 200°F.
Combine all ingredients in bowl and mix until evenly blended.
Press mixture into two baking pans and bake for 15 minutes. Mix granola, turn pan. Bake for another 15 minutes. Mix granola, turn pan. Finally, bake for another 10-15 minutes.
Let cool in pan. It will harden as it cools. Store in an airtight jar.
 
You will end up with two trays of deliciousness that look like this. Yum. 
I also added a dash or two of cinnamon. 
Success!

Tuesday, October 18, 2011

Soft Pumpkin Cookies

Argh. I hate it when I can't find a source for something. I think that's a clear sign of academia taking over my brain. Now I can barely write a thank you note without wanting to add a "Reference" section to the bottom of it. All I can say is that I got this recipe from Abbi's preschool last year. Legend has it, one of the parent's from years past had provided this recipe to help accommodate her child's milk/dairy allergies. That's as about as referenced as things are going to get...

On one of my duty days, this was the activity. Me + 2 teachers + 16 kids needed to make these cookies. Ack! Even more painful was the fact that they had no measuring spoons. I searched the entire school and finally found a questionable set in another classroom. Afterward, I promptly went to the Dollarstore and gifted the preschool with their very own handy dandy set of measuring spoons & cups. So believe me, these cookies are fool proof. I had 16 four year olds as my assistants and a haphazard set of measuring spoons. Enough said.

Soft Pumpkin Cookies
2.5 Cups Flour of choice
1 Tsp. Cinnamon
1/2 Tsp. Baking Soda
2.5 Tsp. Baking powder
1/4 Tsp. Salt
1 C. Sugar
1/2 C. Margarine
1/4 C. Maple Syrup
1 Tsp. Vanilla
1 C. Pumpkin puree

1. Preheat over to 375°.
2. In a medium sized bowl, combine flour, cinnamon, baking soda, baking powder, and salt.
3. In a large bowl, cream together: sugar and margarine. Then gradually beat in maple syrup, vanilla, and pumpkin.
4. Beat in the flour mixture.
5. Drop onto lightly greased baking sheet. Bake for 8-12 minutes. Makes 48 cookies.

Another recipe I found online for Old Fashioned Soft Pumpkin Cookies had a glaze on top which looks rather delicious, and is super easy to make. Don't they look divine?
Glaze: Combine 2 cups sifted powdered sugar, 3 tablespoons milk, 1 tablespoon melted butter and 1 teaspoon vanilla extract in small bowl until smooth. Drizzle on top of cookies.

Holly's Pumpkin Cookie tips: I used 1.5 Cups White flour, and 1 Cup Whole Wheat flour. I also cut down on the sugar, using 1/2 Cup Brown, and 1/4 Cup White Sugar. I used my own pumpkin puree, but you could use canned pumpkin, making the color a deeper orange. After dropping cookies onto the baking sheet, flatten slightly, as they will rise significantly (which can extend the cooking time and dry them out).

Thursday, March 24, 2011

Black Beans with Rice

So this is basically my favorite recipe...EVER, so I'm a little shocked that I've never shared it on here before. That said, pictures really can't do it justice, so don't get too caught up in the pictures (I mean really, how do you make mushy black beans look as delicious as they really are?). So take my word for it, take my husband's word for it...its stinkin' delicious...

At my wedding shower some of the gals brought along some of their favorite recipes to add to a book for me, and this one was courtesy of my maid of honor. I had eaten it a number of times at her house and had always raved about it. So this has been a tried and true throughout my entire marriage, and one that everyone enjoys!

Black Beans with Rice
Ingredients
2 Tbsp. Olive Oil
2 cans, Black Beans (19oz/540mL)
1 Green Pepper, coarsley chopped
1 Medium onion, coarsely chopped
1 jar, Pimentos, 4oz (with liquid)
3-4 Cloves Garlic (or more to taste)
2 Beef Bouillon cubes
1/2 Tsp. Cumin
Black Pepper, several dashes
Directions
In large pot, heat 2 tablespoons olive oil. Saute onion, green pepper, garlic for a few minutes until softened. Then add to blender, along with pimentos (with liquid). Puree until a medium-smooth consistency (add more olive oil if needed).
Return to pureed mixture to pot, and saute for 10-15 minutes, stirring often.

Then add beans (keep liquid from one can, drain second can), bouillon cubes, cumin and black pepper. Cook slowly (low/medium) heat for a minimum of 30 minutes, stirring often. The longer you cook (1-2 hours), the more flavour you get, and the thicker the consistency.

Serve over a bed of basmati rice, garnish with a dollop of sour cream and a sprinkle of chopped onions.

Unfortunately my final picture of it in a bowl was too fuzzy (blasted new camera!), so this is just the end result in a pot. Its rather thick, and goes beautifully over a bowl of rice.
Holly's tips
(because you knew there had to be some...)

~This recipe originally called for 4 cans of black beans, but it just made way too much food, so we cut it in half, and that still leaves plenty for leftovers.
~In the original recipe you actually blenderize the ingredients first and then saute them, but I've found that they puree much easier (and with less olive oil) once softened.
~Pimentos are a type of pepper, although not terribly hot. I have always been able to find them in Safeway, Save-on and Sobeys. They are on the top shelf, usually near the olives.
~You could add the liquid from the black beans from both cans, but I think that ultimately increases the sodium and its not necessary.
~ I am a huge fan of my Cuisinart hand blender set. I rarely use our big blender anymore because its such a pain to clean, and I can usually blenderize with this little fella in two batches.
~ I faithfully use McCormick's bouillon. I love the flavor, and while it still has fairly high sodium content, I have yet to find a lower sodium one I prefer.
~ As a cumin lover, I generally end up adding at least a tablespoon. And maybe 5-8 garlic cloves. And yes, we like our garlic around here!

Wednesday, January 12, 2011

Experimenting.

No, Mom, I'm not experimenting with drugs! More like trying out some new recipes. I don't know about you, but I am a clipper! When it comes to books and magazines, I cut, clip, tear, dog-ear, you name it, I do it! Over this past year I've had a magazine subscriptions to House and Home, Style at Home, Chatelaine, Good Housekeeping, and Homemakers! Eeek!

Talk about magazine OVERLOAD...
I end up having a pile that looks like this! Ugh. So this year, I've finally come to my senses and cut down on the subscriptions. Although, in my defense, most of them were the freebies you get when you buy specially marked boxes of Cheerios. I'm only keeping Chatelaine for now. I find their articles super practical and helpful. As much as I love my home decor magazines, I just don't have the time right now, and most of the things I do like are fairly timeless, so I can easily find them in a magazine that's 2 or 5 or even 10 years old. Not to mention all the amazing ideas you can find online.

I'm a happy camper when my magazine stash looks something like this...
So back to my clipping addiction. Its not good. I've been at it since we've lived in Alberta, and you end up with a pile looking like this. And this is just my recipes, not my home decor/crafting ideas! Yikes!
The other night, while watching a show with the husband, I trimmed, tossed and three-hole punched all of the recipes that I have been clipping over the years. (FYI: I cannot just sit and just watch a movie. I must be doing something with my hands. Unfortunately for my weight, eating can fit into the "doing something with my hands" category. Sigh).

If you'll notice, on top of that pile sits a cute little book, entitled "Recipe Keeper." Brilliant idea right? Yeah, only if you use it! My cousin gave me that over a year ago now. Ahem. It has been collecting dust, and I have continued on with my clipping addiction. So I finally put all the clipped recipes in their respective places, Main Dishes, Appetizers, Desserts, etc. Now, the real trick is to try them all out.

We also have a number of cookbooks that also have a few recipes that I would like to try out. I am slowly moving away from cookbooks, because I do find most of my recipes online these days, but there is something about a pretty stack of cookbooks on a counter top, isn't there? I'd really like the husband to build me a mini bookshelf for this spot that would span from the base of the cabinets down to the counter top. If it could fit the cookbooks, and maybe two little baskets for kitchen randomness, I'd be a happy camper.
Last week was black bean week. I tried out 3 different dishes, all having black beans as a main ingredient. Two got 5 stars, and one was a 3-4 stars (probably won't keep that one). But wow. 3 recipes down, in just one week! I found it took a bit longer to shop and plan my list, but I think it really paid off. We got to try something new, and I made a dent, albeit a small dent, in my recipe stash.

So this week, there really isn't a theme, but again, three more nights of new meals. I actually really enjoy trying out new recipes, its just the matter of having the time to look them over, shop for them, and make them.
I realize I still haven't done the 2010 follow up post, or the what's to be done in 2011, but seriously, where is the time? But one of my thoughts for 2011, is use up what you have. This can span from clothing, to food in my cupboards, to craft items, to home renovation items. So I'm slowly working through the recipes I do have. And the recipe binder I do have.

Saturday, August 14, 2010

Nanaimo-ey goodness...

The time has come for the yearly Nepper pilgrimage back to our hometown of Nanaimo. We used to get back there twice a year, but over the past few years its only been once, in the summer. Not like the so-called winters are bad...if you don't mind a little rain! When it was just us, or just us with one in the tummy, a 12 hour drive seemed like nothing, but now with two kids, its a bit of an ordeal. Not just the packing, but the actual traveling. Yes, I know, I know, we could fly, but when you do a cost comparison, it just can't compare. Especially when you tack on the cost of a car rental...yowza!

Our life has been super busy with me finishing up school on Friday (Read: Mommy was a stressed out nutcase all week, and I think the entire family sighed a huge sigh of relief along with me). So we move from busyness, into more busyness. This weekend has consisted solely of getting stuff finished up, organized, and PACKED! Thankfully, I quite enjoy packing. It feeds into my organizing tendencies. Few things in life can satisfy nearly as much as a neatly packed suitcase.

This year we are quite happy to be making the trip home with good friends of ours. They've never been to Beautiful BC, let alone the picturesque Island. So we are quite excited to not only have traveling partners, but also be able to share our hometown with good friends. In a highly dorky manner, we will be a mini Ford Windstar caravan. Thankfully theirs is beige (ours is sage green), so that reduces the dorkiness...somewhat ;)

A few weeks ago, in preparation for our trip, we sat down and were looking at some tourism guides. It really is odd to see your hometown, and places you regularly hung out at in a "Visitor's Guide." Conversation came up about the infamous Nanaimo Bar. Yes, that's really where they are from. Well, technically it looks like it was a lady from Ladysmith who is credited for the first published recipe...but seriously, a Ladysmith Bar? I think not!

After researching the history of these bars, I stumbled upon the "official recipe" on the City of Nanaimo website. As a ex-resident, I'm slightly embarrassed to say that I had no idea there was an official recipe. Not to mention I had never even attempted a batch of these little gems. So I quickly remedied this problem. I like to call it pre-trip preparation.

If you too would like to attempt a batch of Nanaimo Bars, here is the official recipe.

Nanaimo Bar Recipe

Bottom Layer
½ cup unsalted butter (European style cultured)
¼ cup sugar
5 tbsp. cocoa
1 egg beaten
1 ¼ cups graham wafer crumbs
½ c. finely chopped almonds
1 cup coconut

Melt first 3 ingredients in top of double boiler. Add egg and stir to cook and thicken. Remove from heat. Stir in crumbs, coconut, and nuts. Press firmly into an ungreased 8" x 8" pan.

Second Layer
½ cup unsalted butter
2 Tbsp. and 2 Tsp. cream
2 Tbsp. vanilla custard powder
2 cups icing sugar

Cream butter, cream, custard powder, and icing sugar together well. Beat until light. Spread over bottom layer.

Third Layer
4 squares semi-sweet chocolate (1 oz. each)
2 Tbsp. unsalted butter

Melt chocolate and butter overlow heat. Cool. Once cool, but still liquid, pour over second layer and chill in refrigerator.

In my preparation of the Nanaimo Bar...a cute helper is a must have!
My first-ever double boiler attempt worked quite well.
The bottom layer looked so delicious I just wanted to stop right there and grab a spoon...
I picked up my custard powder at Bulk Barn. 62¢ is what it cost me for 2 Tbsps, compared to the $4.99 Safeway was going to charge me for an entire box, I'd say that's a pretty swell deal.
Mmm, chocolaty goodness...
I doubled the recipe so that we could share our Nanaimo Bar plunder with those near and dear to us. I had one 9x9 dish, plus a 9x13 to divide up. Considering 6 families got to nibble on some Nanaimo Bar-ey goodness, I'd say it went pretty far. And the reviews were quite good!
A picture just can't do the deliciousness justice.
So we'll be gone for 3 weeks to our lovely little Island. Staying with my parents. Visiting the many beaches. Enjoying the hot weather (compared to ugly, rainy, mosquitoey Edmonton. Ugh!). Visiting with old friends. Of course we'll join in on some of the touristy stuff with our friends. Its actually an interesting concept, being a tourist in your own town.

I was looking at our pictures from last year, and its amazing how few I took of the actual town and the scenery. Usually I'm more interested in taking pictures of friends or their kids. I think partially because those beautiful mountainous scenes and breathtaking beach side sunsets are imprinted in my mind. I've spent countless nights enjoying those views, so when I return I'm not quick to take pictures of them. To be honest, I often forget just how beautiful it is...until I go back. So this year I hope to view it from a "tourist's perspective" and try to see some things and places and maybe even people that I wouldn't normally see.

I hope to do some blogging from the Isle, so stay tuned...

Wednesday, May 19, 2010

Fantastic Falafels.

I've delved into the world of falafel making. I in no way claim to be a falafel expert, and I'm quite sure that they are normally made into little meatball-sized balls, but I prefer them as a patty (like a hamburger). Regardless of how they are made, this recipe is most definitely a keeper, and since I made them the first time a few weeks ago, Rob has since then requested them (a rarity that my husband asks me to repeat a recipe I found online). So this time I decided to take some pictures and share some falafelly goodness with my readers.

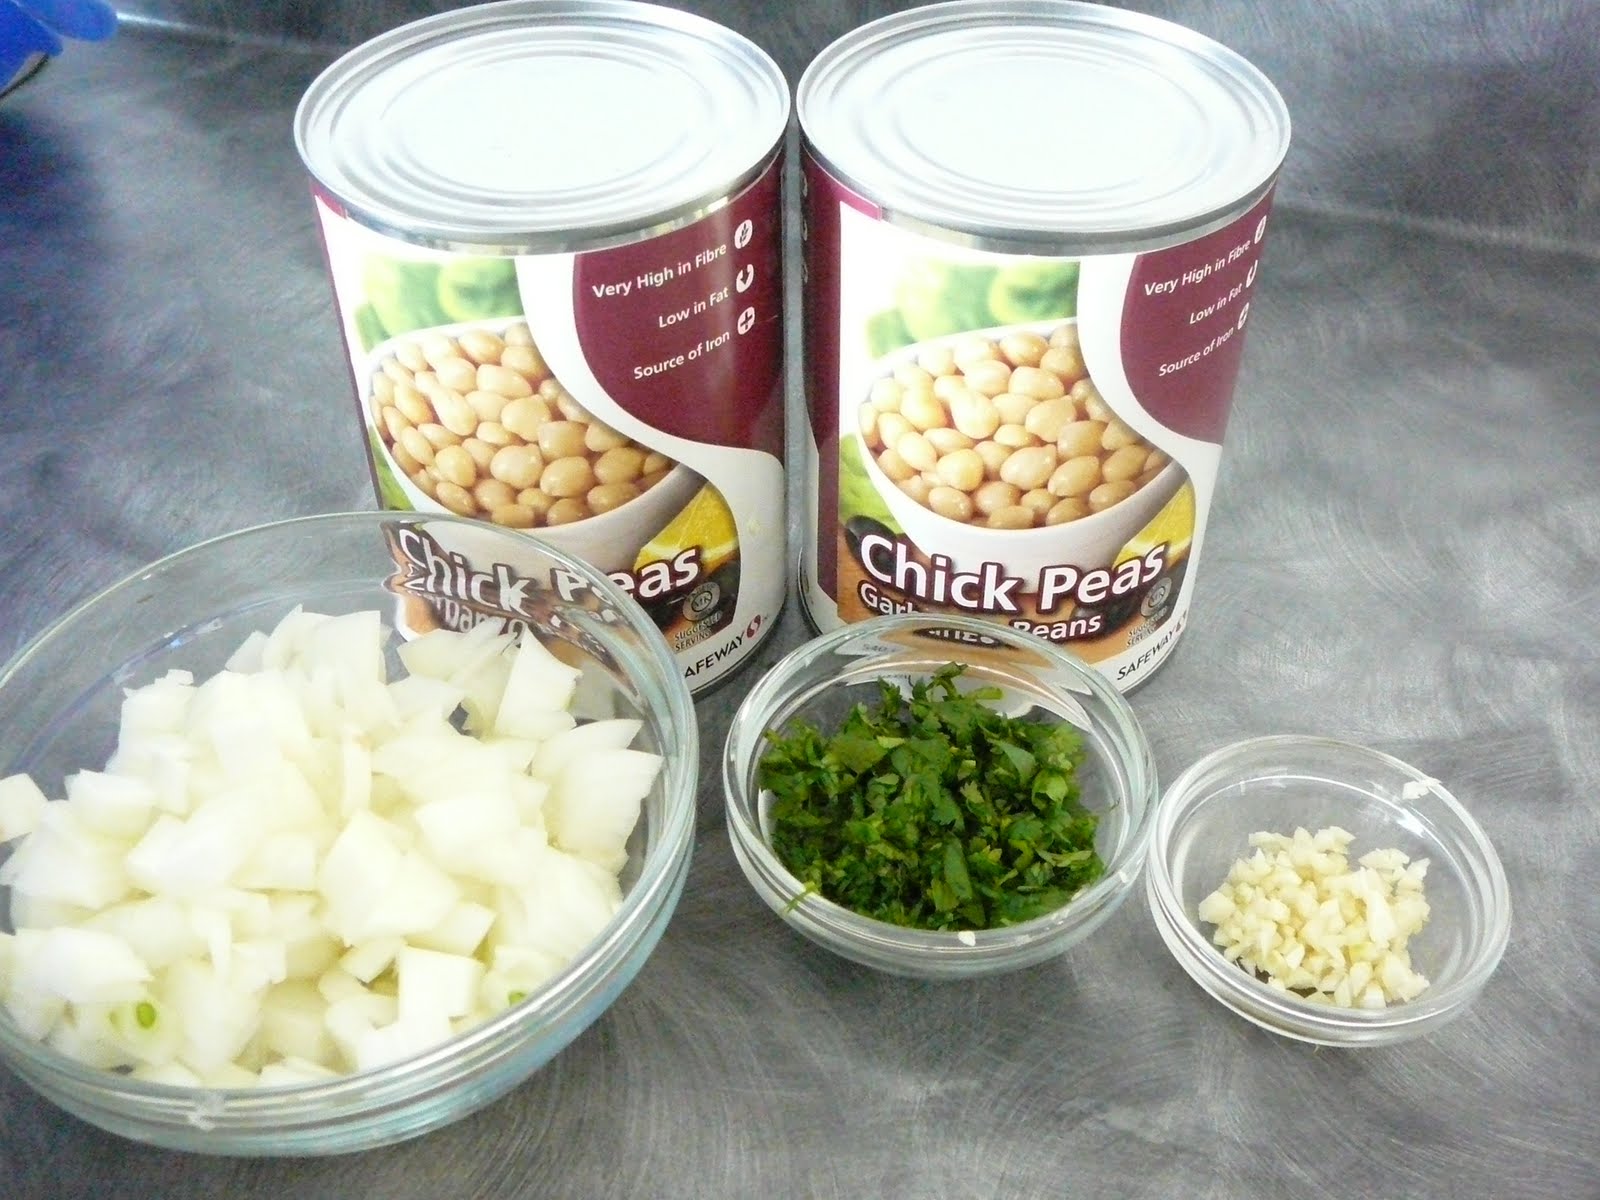
This is the extent of the ingredients (minus the plethora of spices).
*Note my new glass bowls that I got from my cousin as a lovely Mother's Day gift. A 25 piece set of bowls and lids from Costco for $23.99! I love it!
I doubled the recipe. You mash up the chickpeas, which is a challenge when you discover that your husband decided to use the potato masher for some random project in the basement. I had to get down and dirty and use my hands.
Once all the ingredients are mixed, I shaped them into patties. I got 10 patties when I doubled the recipe. And while the recipe calls for you to deep fry them, I do not, nor will I ever, own a deep-fryer, I just put a good coating of canola oil on the bottom of my pan.
Enough with the pictures, here is the recipe.
Jeanie's Falafel (from allrecipes.com)

1 (19 oz) can garbanzo beans, rinse & drained
1 small onion, finely chopped
2 cloves garlic, minced
1.5 tbsp. cilantro, chopped
1 tsp. dried parsley
2 tsp. ground cumin
1/8 tsp. ground turmeric
1/2 tsp. baking powder
1 C. fine dry bread crumbs
3/4 tsp. salt
1/4 tsp. pepper
1 quart vegetable oil

1. Mash the garbanzo beans in a large bowl. Stir in the onion, garlic, cilantro, parsley, cumin, turmeric, baking powder, bread crumbs, salt & pepper. Shape the mixture into 1.5" balls (you should get 18 to 24). Or 6 patties.
2. Heat the oil in a deep fryer to 375° F. Carefully drop the balls into the hot oil, and fry until brown. If you do not have a deep fryer, heat the oil in a heavy deep skillet over med-high heat. You may need to adjust the heat after the first few falafels. Turn often so they brown evenly.

*Some Holly notes. I didn't have turmeric. And I didn't use as many bread crumbs as I should have this time, so mine look a bit crumbly. Regardless, still stinkin' delicious. We eat them in pitas. I put a little bit of low-fat ranch dressing in there. Some lettuce. Tomatoes. Sprouts. Yummo!

Behold, falafelly goodness...
~
In other Nepper news I thought I would get your opinion on something. OK, I'll admit it, I'm a dumpster diver. Shocking I know! Now let me clarify. I don't literally jump in the bins, but I will often do a drive-by. Behind the mall across the street they have a recycling drop off, and apparently people feel this is a totally appropriate place to dump numerous, random household goods. From old building materials, to microwaves, to clothing, to a crib, to highchairs, etc, etc.

So with my savvy dumpster diving skills I've scored a crib. Not like I need a crib, but I listed it on kijiji and gave it away. If it isn't gone by the time the recycling guys get there it goes to the dump. I scored two perfectly fine IKEA highchairs which I sold on kijiji for $15. I found a mint condition Running Room jacket and sold it for $20. Seriously people!?! I'm always shocked by the stuff people drop off there.

So when I spied this beauty, I had to pull over. Or at least I thought.
Its true. I'm drawn by sparkly things. Shine some silver in front of me and I will come running. Show me the glint of a diamond and I will likely drool. So a lamp smothered in sparkly goodness is sure to attract me. So I proudly walked in the house with it and Rob immediately said, "Why?" As you can well imagine my husband isn't totally impressed with my dumpster diving tendencies. Although when I make money off of it, I do see a glimmer of pride in his eye. That is until I come home with the next pile of junk...oops, I mean treasures!

So are you with Rob? Is the lamp the height of hideous? Have I lost my edge?

Friday, April 23, 2010

Soupy Soupness...

This is one of our newest fave meals around Nepper's Landing. A potato-based soup. In the past I used either corn starch or flour to thicken a soup, because lets be serious, this girl likes her soup THICK! Seriously, I'm a huge fan of cream soups. Or if its a veggie soup, I like there to be very little broth, or sometimes I'll even serve it over rice for some added oomph.

So when Rob's Mom mentioned that you could thicken a soup with potatoes, I will admit, I kind of brushed it off. "Uh huh...isn't that lovely. I think I'll just stick to my corn starch thank you very much." That was until I made one. And believe me, I'm now a believer. Its brilliant...and the best part? Super easy.

Here's a photographic walk through of a soup I made recently. This is just one of many combo's you can use. Seriously, the options are endless.

So for this 'soup de jour' I was mainly trying to clean out my fridge before I went grocery shopping. So if it remotely resembled a vegetable, it got thrown in. I used potatoes (obviously), cauliflower, sweet potato, garlic, onion, carrots, celery, zucchini & leeks. Now that's what I call a Vegetable Soup!
I chopped all of them up and threw them in a stock pot with about 8-10 Cups of water. Now don't get too fancy with the chopping. That won't matter. I let that simmer for 20-30 minutes or until the veggies were remotely soft.
For flavor I added two buillion cubes and bit of salt and pepper. These are the kind of cubes we use. Not super great in the world of sodium, but no animal products. Not like that's totally terrible in this house, but I also prefer the flavour to the Knorr ones. And if I have my friend over who's daughter has dairy allergies...I can serve her soup!
So why doesn't the chopping matter? Because you are going to whip out your "handy dandy, holy cow, how did I ever live without one of these hand blender." Seriously, on my top 10 bestest kitchen doo-dads list. I suppose you could also use a food processor or a blender or even one of those blasted VitaMixes that seem to be all the rage these days. But for me, a hand blender works just fine. And with a quick rinse under the tap, voila, its clean and ready for the next task. Mine is a Cuisinart, and its divine.
So once you've hand blended the stink of out of those veggies, it should look something like this...
A pot full of creamy, soupy goodness. Mmm...

I will add that I probably wouldn't use cauliflower again. The next day the color had darkened significantly, and I'm pretty sure it was from the cauliflower. Not like it wasn't even more delicious on day #2 when the flavors had melded some more, but yeah, didn't look super appetizing. Don't get me wrong, I'm not a cauliflower hater, but I can find some other fantastic uses for it.

So there you have it. Super Simple Scrumptious Soup.