Wednesday, July 8, 2009

More Closet Fun!

OK, so this one isn't as exciting as Abbi's closet re-do, but I figured I better show a few pictures. Who doesn't love a little before and after lovin'?

I decided our linen closet needed a little refresher. This was in the midst of my closet chaos. I still have ours, Gabe's, and the front hall closet to do, but I'm trying to put my Obsessive Compulsive Closet Disorder on hold at the moment. Focus, Holly, focus!

This was pretty simple though. We plugged away at it for a week or so. So basically it was two coats of white paint, and I painted the existing shelves white (previously bad 80's laminate wood). I also went to a great little place here in Edmonton called Home Re-Use-Ables and picked up a new closet door. They sell used home stuff (similar idea to Habitat for Humanity's ReStore). They get contracted to demolish houses, so they go in and take whatever they can sell before they tear it down. And believe me, they have some pretty funky stuff for sale. Its definitely worth a visit if you are hunting for funky used home stuff!

I was looking specifically for a closet door that matched the profile of Abbi's closet door. Eventually I would like all of the closet doors (and possibly interior doors) to have the same profile. So when I found the right profile, I got so excited I kind of forgot my measurements! So I bought a door that was about an 3/4 inch smaller on the side and the top. Poor Rob, did he have some work to do! Thankfully from his baseboard heist he has a schwack of the stuff that goes inside door frames (what the heck would you call it?). He put that in, added a little mud, a splash of paint, a touch of sanding, and voila, new smaller door frame. The man truly is brilliant!

So anyway, really I realize that my linen closet probably isn't all that exciting to the world of blogging, but I do want you to know that it will forever change the way I fold my laundry. Well, no, that might be pushing it, but at least it looks much prettier!

And I need to point out, the before and after pictures really aren't fair. You know how in the weight loss commercials where in the before pictures the people are slouching, haven't brushed their hair for a week, have food in their teeth, and are putting on their best ugly face they can muster? Well that's kind of my closet before picture. It doesn't stand a chance. Its a mess, and the lighting is awful. Oh well, you'll get the picture...

Pre closet rehab...
And post closet rehab...
So there she is, in all her closet glory.
Total cost $31.35
"New" door $20.00
New knob $5.69
Bi-fold closet door kit $5.66
The white paint, mud and inner door casing we already had.

Tuesday, July 7, 2009

Party Planning

This week I'm busying myself planning Abbi's 3rd birthday party. We are planning to have a small group of kiddos and their Mom's come over on Friday morning. Most of these ladies are part of a Mom's group I go to. Basically we had all of our first kids together (just months apart). Then came the number two's (again, just a months apart). And then some of the real troopers of the group moved onto number three. To those women...I salute you!

On Saturday we are having the Grandparent's over and a few adult friends dropping by. So party #2 I suppose. This one will be much less laid back as I'm sure grown ups aren't as interested in playing games, blowing bubbles and being princesses and princes. Well, at least they won't let on...

So I'm trying to stay sane, and calm. And not stressed out. Really I do enjoy stuff like this, but it can so quickly become overwhelming. I think the concept of keeping up with the Joneses comes in. Then just the overall amount of work that goes into it. And time management. If I don't keep on top of this, I will most definitely be up until 3:00am on Thursday night! Yikes!

I'm working on taking deep breaths, and really focusing on the bigger picture. I mean really what are we celebrating here? Abbi of course! So I want her to enjoy it, enjoy her friends, show her friends and my friends a good time. And really beyond that it kind of just gets silly. Perspective Holly, perspective...

I likely won't be blogging much this week as a result, although I thought a little party sneak peek would be fun. I'll have to see if I can squeeze it in. Tonight I did a big shop at Dollarama. I tell you, dollar stores have come a long way! They still sell a good amount of junk, but within that you can really find some affordable treasures! So I'm quite pleased with all the goodies I got, and with a price tag of $42, who can go wrong?

So here I go...deep breath...deep breath...

Monday, July 6, 2009

The "New" Living Room

I'm so glad I can say our living room paint job is done! We are both very pleased with how it turned out. And I guess its like anything, after a day or so, you almost forget the previous color, and kind of wonder why you didn't do this months ago. I'm thrilled its done!

Here is kind of a painting back story. When we were first married we lived in this adorable little coach house. There was the giant main house with gardens everywhere and a huge Koi pond. It was beautiful. Our little house was on top of a three bay garage about 500 metres away (so still very private). Seriously people, it was adorable. Idyllic! We asked if we would be allowed to paint it, and the landlord said yes. She said she would reimburse us for the paint...great!

So off I went to Home Depot, probably with a little skip to my step. I was so excited! I ended up using all seven colors of the rainbow in that house. I know! Intense. Lets start at the beginning of the house and do a walk through...

As you step into the house you are in a little entryway, painted a deep red. The laundry room is to your left and the kitchen to your right. As you enter the lovely terra cotta (orange) colored kitchen you can look out into the yellow dining area and living room. Then if you continue down a hallway, the moss green bathroom is to your right. At the end of the hallway, the master bedroom is painted an electric blue. The spare bedroom is painted a lovely lilac purple color. And just to top if all off, I think the laundry room may have been beige.

So you can imagine when I gave the landlord at $300 paint bill she was none too impressed. "Well I thought you buy a few cans and do a bit of color here and there, NOT THIS!" So we split the bill, and I'm sure she never agreed to buy paint for her tenants again! And I learned never to put that much paint on a rental, or heck, a house for that matter, ever again!

So fast forward 5 years and here I am, ready to paint a 400 sq. ft living room, and what color did I choose? Hot pink, cherry red? Nope and nope! I picked Ivory. Which I figure is just a fancy way of saying off white, but it has shocked my color sensibilities. I mean doesn't that sound so incredibly boring?

But I completely and utterly love it! Before I could never get House & Home's White Issue. I mean who paints their entire house white? I think I've finally arrived. I've become a believer. Honestly it has brightened up our house so much, and drawn so much more attention to the accents. Its unreal. So when it comes your turn to paint, I suggest the white road. It is slightly overwhelming with the 1000 different versions of white, but honestly, you'll hopefully come out the other end as happy as we are!

So without any further ado, onto a pictoral history of our living room...

These are two pictures I took when we first did our walk through of the house. So not our furniture, not our style, but you get the picture. And yes, that is Jesus hanging over the dining room table. Don't get me wrong. I'm a big fan of Jesus, but watching you while you eat? Kind of weird if you ask me. So now we always refer to that wall as the "Jesus wall."
Fast forward 10 months to us getting ready to paint the living room. We started on Friday morning. Rob's parent's came in and took both kids for most of the morning, and then ended up taking Abbi back to their house for the weekend. Made the entire thing possible.
Thank you guys!

The last shots of that "lovely" feature wall. Ugh, so glad I never have to see it again! Au revoir!
Then one coat of primer lovin'
Then some good ol' fashioned cutting in...
Remove the old "baseboard" which is actually door and window casing. I think the previous owners were just looking for a fast fix. We took it off and replaced the house's original door and window casing. Plus, it perfectly matches the profile of Rob's new baseboard!
If one notes the "expertise" used when installing the laminate flooring you kind of understand the fast fix idea. Yikes!
The work bench (AKA, the kitchen table). We are both messy painters, which is good in a sense, because at least we are messy together. The walls may look incredible, but the rest of the house kind of looks like a bomb went off type thing! Note the customary cup of coffee, which was a must-have for this project!
First coat done, and its already already looking pretty good! The only catch is that it actually ending up taking three coats! I am now a believer in primer. The blue wall that we primed took only two coats, whereas the pale blue walls with no primer took three. Ouch! Thankfully we did have enough paint, and even a little left over. The entire room basically took 2 cans of paint.
"Crisp Linen" by CIL Signature. Eggshell finish.
"Holly's Baseboard Factory." This baseboard came already painted a tan color, so it took three coats of semi-gloss white paint to get it up to snuff. I became a Baseboard Master!
"Rob's Workshop." The weather was slightly uncooperative with our living room painting attempt. We had to pack up the tools many times, only to have the rain stop minutes later and be able to go back outside. Welcome to Alberta!
We basically finished everything (painting, and baseboard installation) by late Saturday night. It went really quickly (despite the numerous coats), and we are so glad it is over and done with.

And here is the finished product!
The living room.
A view of the dining area. Finally, my favorite tablecloth goes with this room!
Some beautifully installed baseboard. My husband truly is a whiz at this stuff. Considering he had to battle out of square walls and uneven floors, he did an amazing job! Doesn't it look incredible? I love the profile!
The casing around the basement door. Also, the best picture of the actual paint color.
And voila, just like that our living room has been transformed! It was a lot of work, but we love it! Next the stairwell, which will take some doin' as we will need to get some sort of scaffolding to do it (two stories high). It will be the same color. Then onto the kitchen, which I'm thinking will be our late summer/early fall project. I'm thinking of continuing this paint color, perhaps a touch lighter into the kitchen. And repainting the cabinet doors. Whew! I'm tired just thinking about it.

Hope you enjoyed this little tour of our house and a glimpse at our "new" living room!

Saturday, July 4, 2009

Almost There...

What plans did the Nepper's have for this fabulous Canada Day/4th of July long weekend?

Jet away to some sunny location? A weekend at the spa? Camping at the lake?

No, no, and no!

You guessed it...we are painting the living room. Woo hoo! Are you cheering along with me? Or perhaps you are too busy juggling your mug of hot cocoa, your roasted marshmallow on a stick, all while you sit in your lawn chair around a warm cozy fire?

Hmm, doubt that, as I don't think many who read this would be tech enough to be reading blogs while camping...but still, probably doing something much cooler than painting your living room.

Regardless, we are painting our living room. I find this terribly exciting. The day we moved in, I vowed I would paint the living room. The blue/perwinkle/purple (whatever color you would call that) feature wall has been taunting me. The other walls were a pale blue, or was it grey? Now don't get me wrong. I'm not a feature wall hater, entirely. I just think they need to feature something...ours didn't. And I never would have chosen that color for a living room.

So its Saturday evening and we started all of this Friday morning (Rob had that day off). So all the painting is done, now its just the baseboard installation left and touch ups. This is the baseboard that Rob was able to get free off a jobsite after they ordered an extra 130 feet. Ouch. Their pain, our gain! Although I never realized how much work went into this. And currently the weather seems to have no regard for my living room re-do as we are in the middle of a thunder storm. Argh!

As with any job there is always bumps in the road. An example would be how the guy at Rona told me we wouldn't need to prime the pale blue walls. Boy was he wrong! Three coats people. Three coats! That is unheard of in my world. Thankfully we had enough paint.

Anyway, that's what we've been up to and I'm hoping to do the big reveal on Monday...
Can't wait!

Monday, June 29, 2009

Jacky's Fruit & Yogurt Muffins

Now, I can't say I know Jacky personally, but I do know the woman makes dang good muffins! I got this recipe off of allrecipes.com (my favorite cooking website), and I am so pleased with them. This is the second time I've made them in a one week period! Here is the recipe, and some pictures so you can have a little deliciousness too!

Jacky's Fruit & Yogurt Muffins

Servings: 24 muffins (I doubled the original recipe)
Oven: 350 degrees F
Prep: 10 minutes
Cook time: 25 minutes

4 C. All-purpose flour
1 C. White sugar
1 C. Brown Sugar (the original called for 2 C. White Sugar. The Brown Sugar is a nice touch).
2 Tsp. Baking Soda
2 Tsp. Baking Powder

2 (8 ounce) containers yogurt. Er...1 C. ish? (I used any old flavor I could find, low fat or not)
2 eggs
2 Tsp. Vanilla
1/2 C. Butter, melted
4 C. Blueberries (I used a frozen mixed berry mix, Costco)

Directions:
1. Preheat oven to 350 degrees F. Grease muffin tins or line with paper muffin liners (I used butter)
2. Stir together dry ingredients (flour, sugar, baking soda, & baking powder).
In a separate bowl, combine yogurt, eggs, vanilla, butter and blueberries. Stir mixture together until just combined; batter will be very thick. Scoop into prepared muffin tins.
3. Bake in a preheated oven for 25 minutes. Or until toothpick comes out clean.


The batter is obviously very blue from the blueberries. It comes out super thick. And if you'll note, I'm being a bit of a night owl tonight, with the clock reading 11:49pm. And they aren't even baked yet, AHH!
The muffins in all their warm, gooey, yummy glory! Mmm! Enjoy :)
And don't let their greeny blue tinge throw you off. They might look kind of funky, but truly are so good.

Saturday, June 27, 2009

A big reveal - closet style!

My heart might be fluttering a bit right now. Whew! I have been waiting to post about this for a week now, and the time has finally come. There are still a few minor things that need to be taken care of, but overall, the project has been wrapped up.

Abbi's closet is finally done! Hip, hip, hooray. Three cheers...for a closet organizer? Sad, I know, but it really does bring me a lot of joy. The geeky organizer in me really gets off on this kind of stuff!

Now, the first catch? It couldn't cost a penny. Or at least not too many pennies! We used materials we already had, and I plan to sell the old white wire closet organizer, which will then bring our total to zero. Possibly with a little profit!

So first thing, uninstall the existing hideous closet organizer. Which really wasn't all that hard seeing as how half of the shelves were already falling out of the wall, causing giant holes in the drywall. A few things to note. See the "lovely" baseboard? Straight out of 1980, and even better, its actually plastic, not even wood. Ugh...shudder. And the hanging rod deserves a mention. Gotta love that brown plastic wrapped around the bar. The bar that doesn't actually reach across the closet...classic!
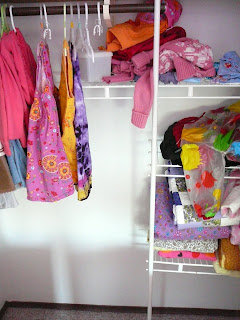
Next, mud the crap out of the closet. I mean this took a stupid amount of time, and is actually probably why this project took nearly a week to complete (I originally thought it would be a lovely "weekend project," ha ha!). I would say there were at least 20 considerable holes that needed to be filled, including one that was about 2x3 inches! Unreal!
Then came two coats of white, semi-gloss paint. Then baseboard installation. I know, I know, you all are thinking, "but why wouldn't she keep those fabulous brown baseboards?"
Garbage dump, here they come!
I don't have a picture of our work area, AKA our backyard, but it was pretty intense. We had Rob's sawhorses set up, and painted shelves everywhere. Basically any available surface was covered in some piece of wood, painted white.

And that was the key, white paint. We wanted to use things that we already had, in order to keep the costs down. We took down an old shelf from our closet. We used the existing piece that was already in Abbi's closet. Then we shopped friend's garages. My cousin had some wood to contribute to our little project. So overall we used 5 different types/grains/colors of laminate shelving. Mostly ones that were a wood veneer laminate. Slap a little white paint on those puppies, and who could ever tell now? Unfortunately we did have to buy the long piece on the left set of shelves, but that was our only cost.

Then Rob had to make little cleats to add support to the shelves. He made these out of MDF baseboard that he had picked up at a worksite. The company had ordered way too much baseboard, so Rob was able to take it all (rather than it getting put in the site dumpster). So we have enough baseboard to completely redo our main floor, and likely do the entire basement when the time comes to finish that as well. Plus, there are numerous lengths of little pieces like the ones below.
Next, install the shelves. Note to self (selves?). When installing shelves in a closet, it may be a good idea to check that the closet is square before cutting the shelves. Rob happily headed upstairs to install his freshly cut square shelves, only to discover the left side of the closet is out by 5/8's of an inch within a foot. Ouch! So there was much grumbling, and eventually, after much more grumbling, much cutting took place. He finally got them cut properly and installed, but this did not make for a happy carpenter. He said he would like to go back to 1979 (when our condo was built) and smack the so-called carpenter upside the head!
This is Rob's angry carpenter look...
Finally the small shelves were in, and Rob just had to put in the supports for the top shelf. We actually don't have the top shelf as of yet, but from another job site raid, Rob has another load of wood coming home. They are tearing down the old office at Rob's site, so the workers were allowed to raid it and take whatever they wanted. I'm excited to see what he scored.
And finally...just open the doors already...end the suspense...
The before again...
The new, and much improved, closet
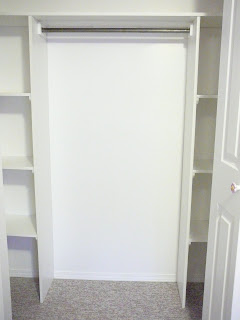
Look at all that delicious shelving. Mmm...
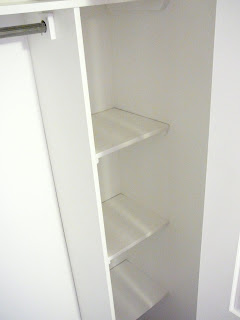
The yummy closet bar, which incidentally, is just the old bar with the nasty brown plastic cover taken off, and a little hacksaw lovin.'
TOTAL COST: $9.76 Plus, a few incidentals that we will use on upcoming projects.

So all this occured because the West side neighbors offered us a free desk (Really, aren't women amazing. All this...from a desk!). So I thought I would do a quick tour of Abbi's room, changed around, all to accomodate this new desk. And actually, the set up makes much more sense now, and is much roomier.

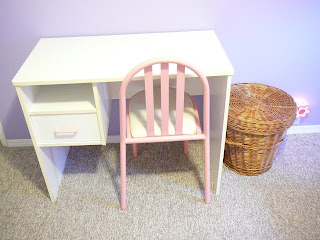
The free desk and chair. It goes perfectly. And it is in awesome condition. Sometimes agreeing to take things before you see them is a risky thing, but this worked out great.
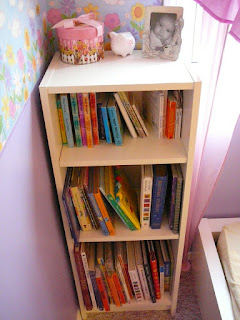
Her little bookcase area at the end of her bed. So cute.
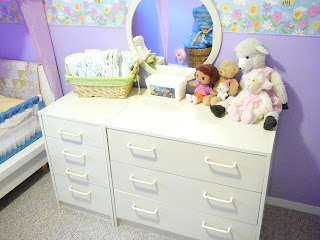
Her two dressers. With the little mirror above, which also came from my cousins house, it almost makes a little vanity.
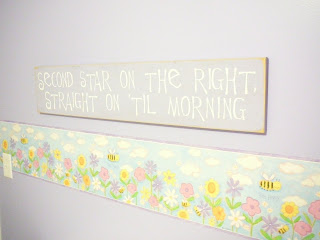
A cute little sign hanging over the desk that I picked up at Value Village for $6.99. The sign's purple background is almost identical to the paint color in her room. Which is made by Behr. Pixie Violet. 620B-4.
And I just had to show this adorable little night light that my cousin picked up for Abbi while she was down in the USA. So sweet!
And finally just a quick shot of the closet after I put everything back in it. Which could almost be the funnest part! The two top boxes are diaper boxes that I use to sort through Abbi's outgrown clothing, Giveaway, Consign, & Keepers. The bottom dresser holds some toys and craft items.
I am envisioning coordinating canvas bins, little tags on the front, funky little boxes.
Mmm, I might just be drooling!
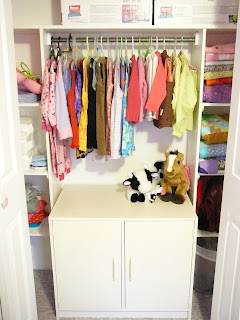
So my final shout out to my superbly, incredibly, talented Husband. I dream this stuff up, he makes it happen - all the while I look cute in the director's chair.
And to my cousin, for having wonderful little finds like this in your garage. Can I come shopping sometime?

Did I mention I've already got sketches of the upcoming closets, and the shelves already ripped out? I know, it never ends! But I figure I'll at least give Rob the rest of the weekend off ;)